Salesforce announced a major change at the Dreamforce event Workflow Rules and Process Builder will be deprecated. It means that Flow will be the future of automation tools. If you haven’t started learning Flows, now is the right time to start learning.
Well, the good news is that your existing/current Workflow Rules and Process Builders will continue to run, even though you will not be able to create new automation using these tools. Instead, you’ll have to create new automation using Flow.
What are Flows?
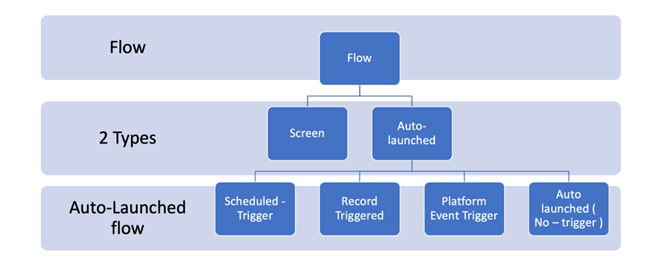
A flow is the part of Salesforce Flow that collects data and performs actions in your Salesforce org or an external system. Salesforce Flow provides two types of flows: – screen flows and auto-launched flows.
To automate a business process that collects data from people, use a screen flow. For example, create a guided tutorial or wizard with screens.
To launch a flow internally when the record changes or when a user clicks a button, use an auto-launched flow. For example, add automation to your page or app to act as a record when a user clicks a button.
To create Flow, you must have the following editions: –
- Essentials
- Professional
- Enterprise
- Performance
- Unlimited
- Developer
Different Types of Flows?
Currently, we have the following types of Flows:
How to build a Flow?
If you’re new to Flow Builder or process automation, take a quick tour of the interface, and then check out our trails! They’re a great way to learn about these powerful tools and discover how they work.
- Open Flow Builder. From Setup, in the Quick Find box, enter “Flows”, select Flows, and then click New Flow.
- Select the flow type, then click on Next.
- Add the elements that you want to use to the canvas.
- If building in free form, connect the elements to determine their order of execution. Connectors are automatically created on the canvas for you if building in auto-layout.
- Save your flow.
Check the official Salesforce Trailheads out to get a look and feel of building Flows. You can build, test, and distribute flows to automate your business process.
After you build a flow, make sure that it’s working as you expect it to by testing it. Then activate the flow. You’re now ready to distribute the flow to users.
Simple Step by step Flow example: –
Step 1. Click the Setup Icon.

Step 2. Enter “Flows” into the search box and select “Flows” from the dropdown list.
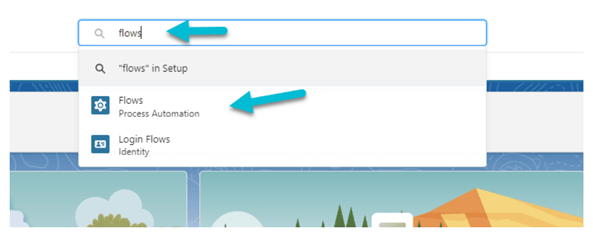
Step 3. Select New Flow Button. A new Flow Builder screen will open.

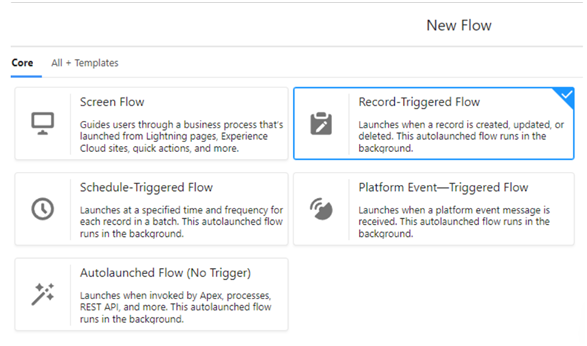
Step 4. Select your Flow Type. In this example, we will be using a record-triggered flow. Then, click the Create button.
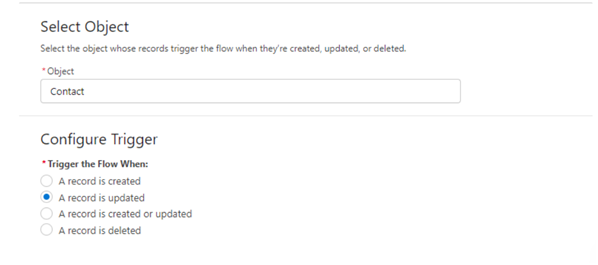
Step 5. Set the flow object and select your trigger. In this example, we’ll trigger the flow when a contact is updated.
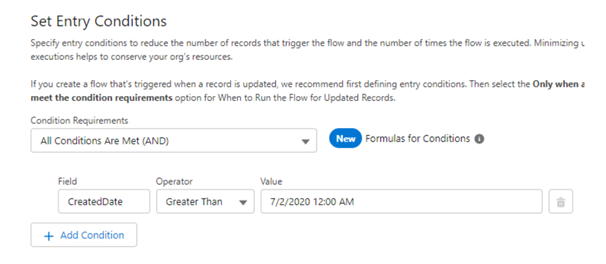
Step 6. Set entry conditions. This is a filter that ensures that your flow only applies to records that meet certain conditions. Not all flows use entry conditions, but in some cases, it may be a good idea. For example, if we wanted our flow to only apply to records created after July 2, 2020, we would add an entry condition like this:
Step 7. Now choose which optimization option you would like and click the Done button. For most flows, Actions and Related Records is a more practical choice.

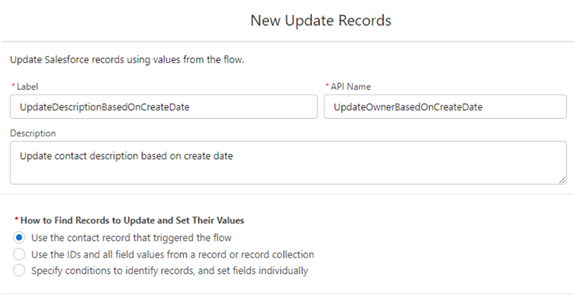
Step 8. Set up your data update and click Done. Here we are updating the description for any contacts that meet our criteria.

Your basic flow should look like this:
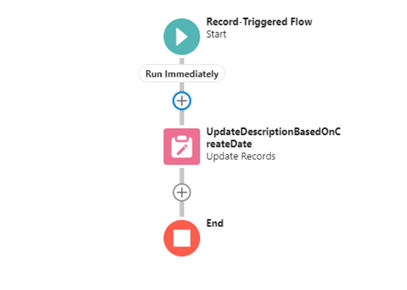
Remember to save your flow. Once saved, you can choose to activate your flow, or run it immediately: –

How to Test your Flow?
Once you’ve built your Flow, you can test it. For testing, you will require the “Manage Flow” permission set.
Final Step, Distributing your Flow!
Once you’ve designed and tested your flow, it’s time to put it to work! Flows can be executed in several ways, depending on who the flow is designed for. Internal users, external users, or systems can run a flow, or a flow can be deployed for another organization. Following are the activities you can do while distributing the Flows: –
- Activate or Deactivate a Flow
- Flow Distribution Concepts
- Distribute Flows to Users in Your Org
- Distribute Flows to Users Outside Your Org
- Distribute Flows to Automated Systems
- Distribute Flows to Other Orgs
- Always Run in System Context
Best Practices for using Flows: –
- Plan out your flow before you start building.
- Build your flows in a test environment—like a sandbox or Developer Edition org.
- Never hard-code Salesforce IDs.
- Wait until the end of the flow to make changes to the database.
- Control when running users can navigate backward.
- Provide an error handler.
- Save early and often.
- Restrict data access via profiles and permission sets.
- Control data access with the Sub flow element.
- Test as many permutations of your flow as you possibly can.
- Avoid accessing external objects after DML operations in a transaction.
What is the difference between Flow Workflow and Process Builder?
For updating related records, Process Builder can update any field on any related record, whereas Workflow can only update some fields on a parent record of a Master-Detail relationship. Process Builder can also update multiple related records in a situation when all of a record’s child records need the same update.
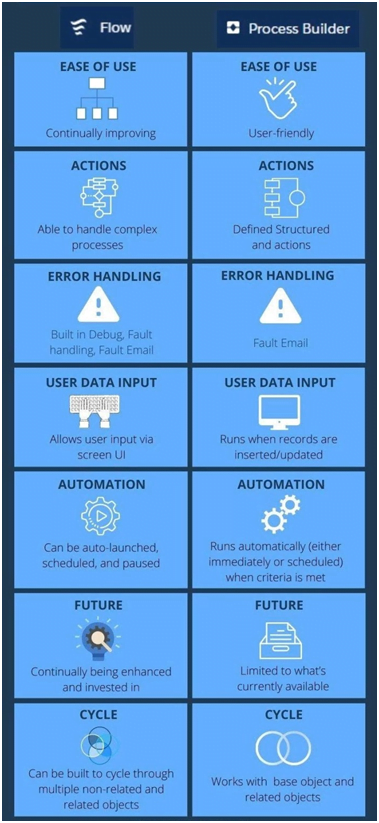
Why are Flows better than Process Builder?
Flow takes up a lot less processing time than Process Builder (depending on how you build them) so it should be taken into consideration if you are building multi-node process builders. If you have a background in technology and have dabbled with code before, the logic of Flow tends to make more sense.
In order to dive deeper into flows, or to experiment flows using your own actual scenarios, reach out to us by filling out your details here and we will get back to you. Or simply write to us at [email protected] and we can get the best solutions for your problems regarding flows.


