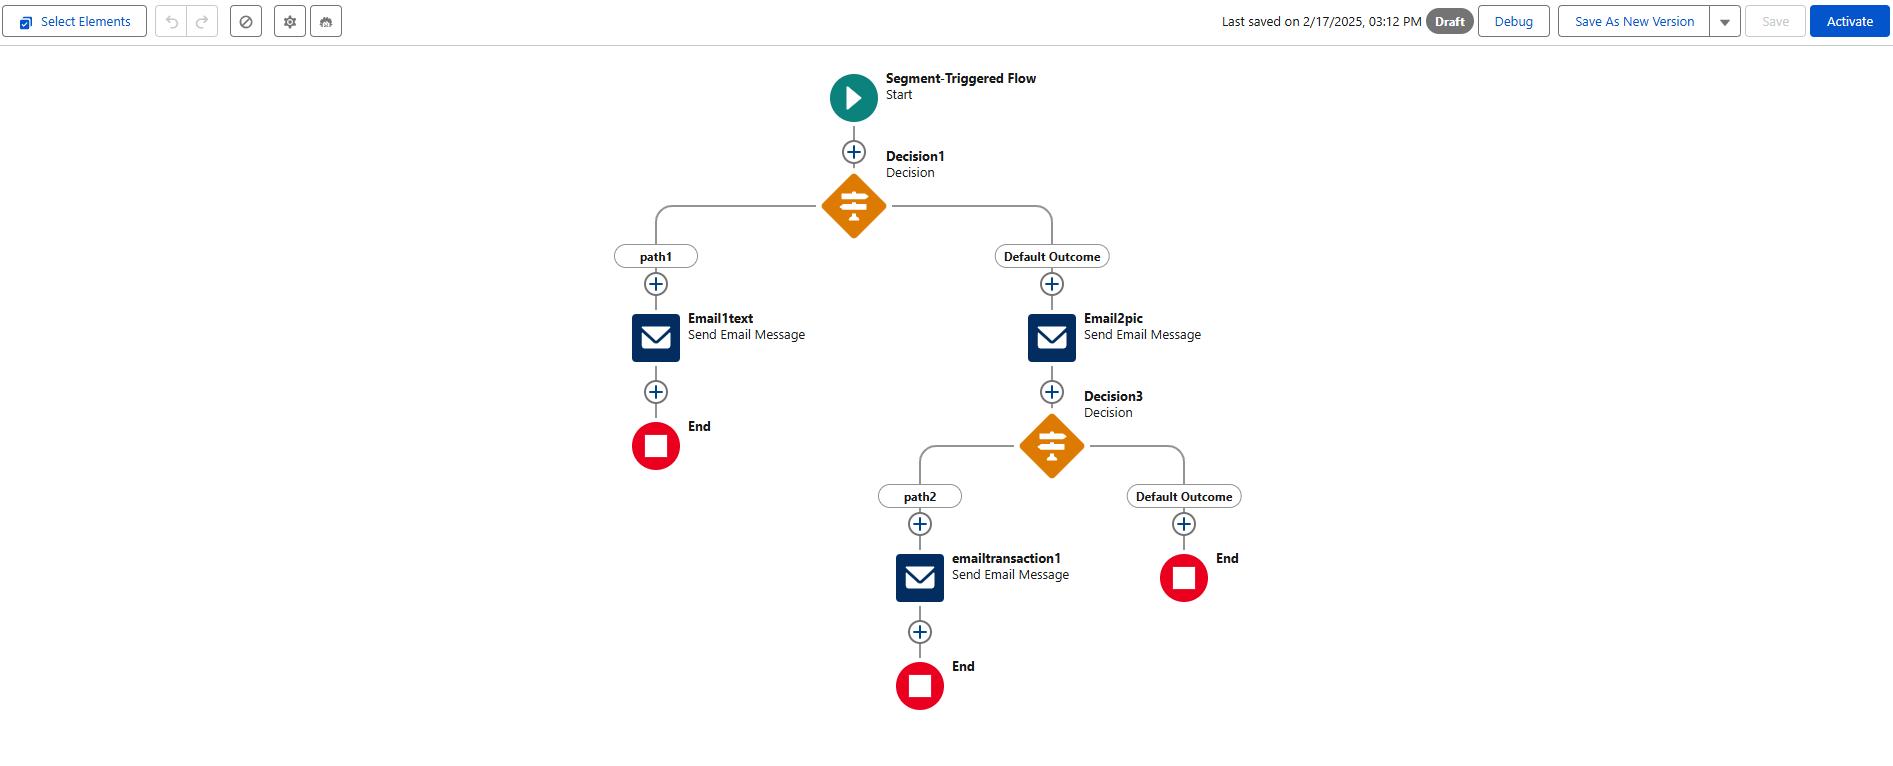
Marketers need more than just automation—they need smart, data-driven engagement. That’s where Data Cloud Data Graphs come in, helping us create better audience segmentation in Marketing Cloud Growth Flows.
By using Data Graphs in Decision Splits, we can send the right message to the right people based on real-time data. Whether it’s checking if a lead is converted or sending personalized emails, this approach ensures every customer gets relevant communication.
No more one-size-fits-all marketing—this is segmentation that adapts in real time. Let’s dive into how MC Growth and Data Cloud make this possible!
Setting Up Data Graph in Data Cloud.
First, we will set up our data graph in Data Cloud.
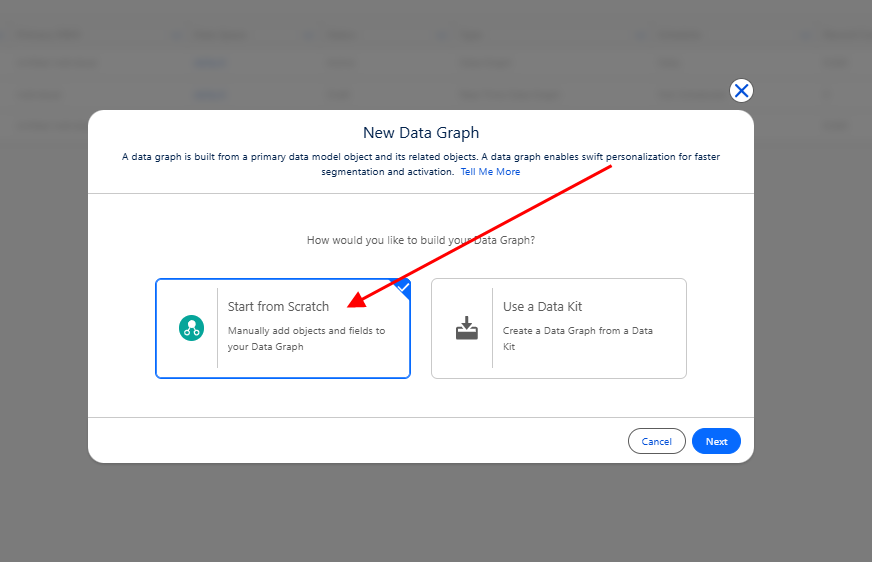
Go to Data Graphs in Data Cloud, click New, and select Start from Scratch.
Develop and integrate custom objects within Salesforce to efficiently store critical information, including orders, purchases, and store-related data. This customization aimed to streamline data management and provide a more tailored approach to client interactions.

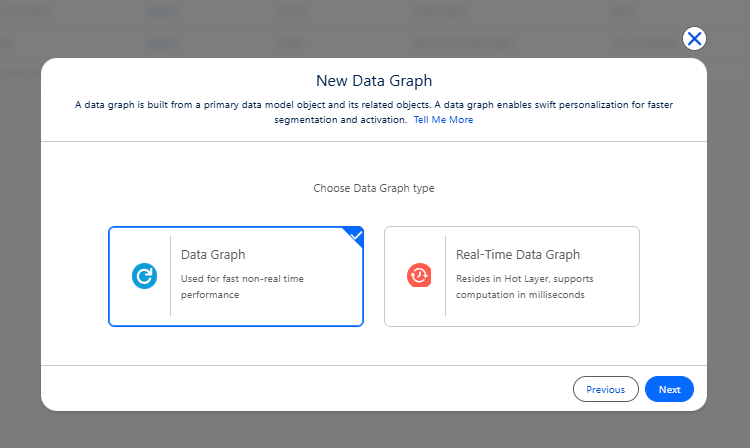
Datagraph type: Choose either a non-real-time data graph or a real-time data graph.
I’ll go with the non-real-time one.
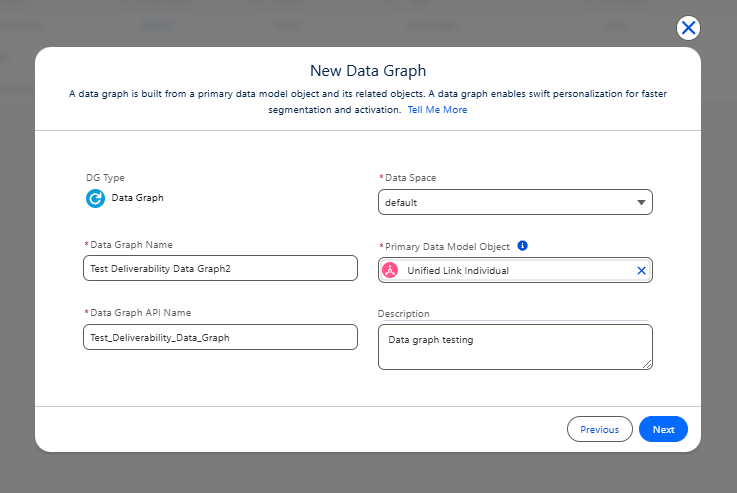
Provide a name for the Data graph. Select “Unified Link Individual” as the Primary Data Model Object and add a description.
Make sure your Data graph follows this structure. It must include Contact Point Email and Contact Point Phone to be used in Marketing Cloud.
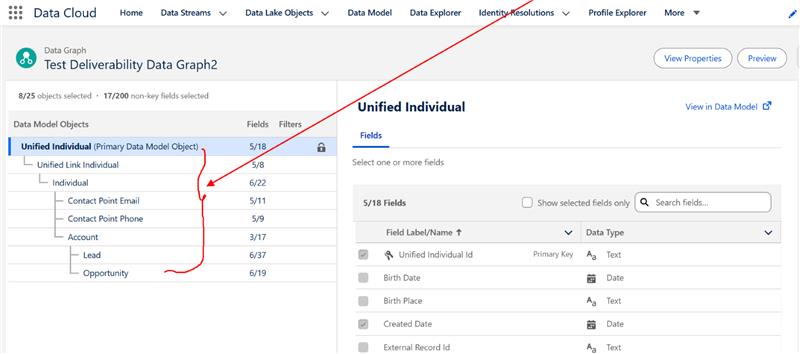
Now, you can link the objects in the data graph and select all the fields you want to use in flows, including personalization in emails.
For our flow, we will check if a lead is converted, so I will add the Is Converted field in the Lead object.
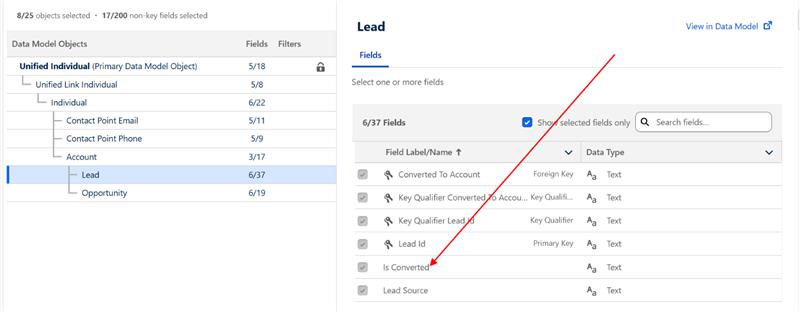
Once everything is set up, we go to Marketing Cloud Growth to configure our flow.
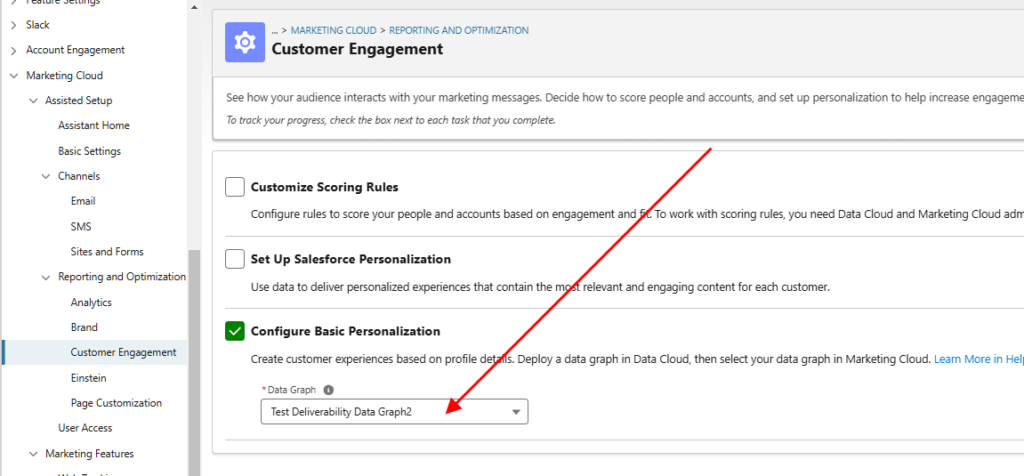
Make sure that in Setup → Marketing Cloud → Customer Engagement → Configure Basic Personalization, you have selected the data graph you configured earlier.
Setting Up the Flow
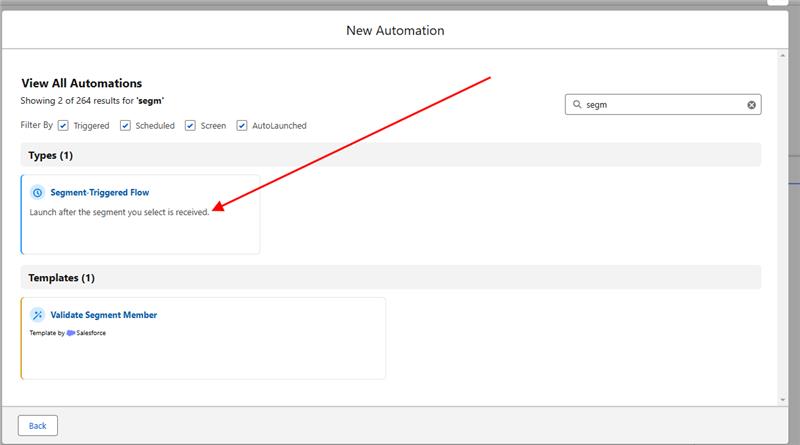
In Growth, click on Flows, create a new flow, then search for and select Segment-Triggered Flow.
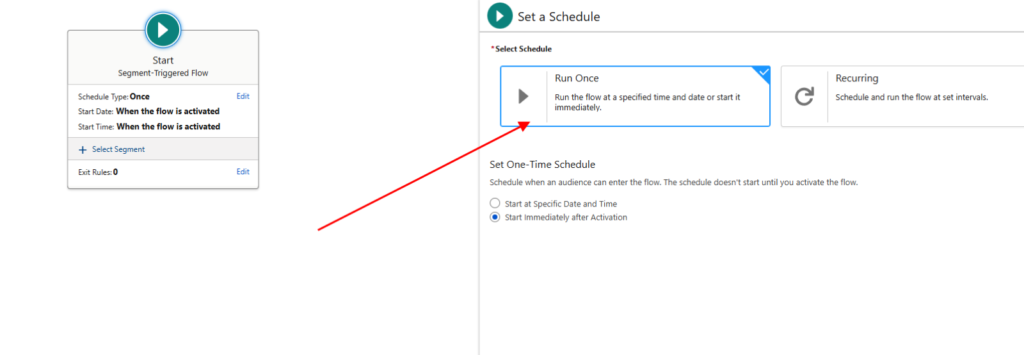
Set the Schedule:
You can choose Run Once or Recurring. I’ll select Run Once and choose Start Immediately After Activation
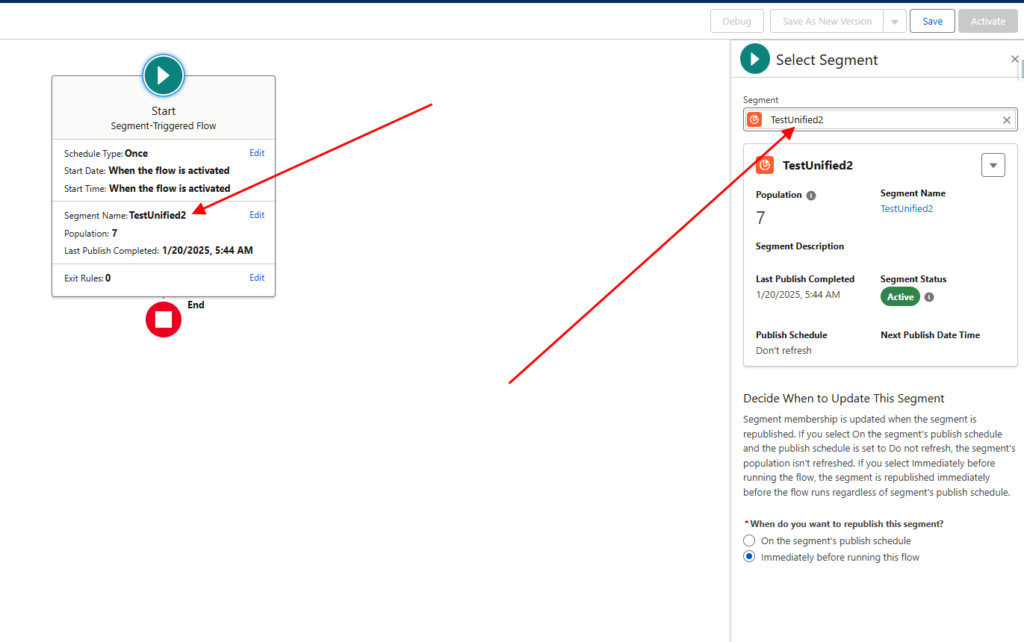
Select the Segment:
Choose the segment you want to use. In my case, it’s “TestUnified2”.
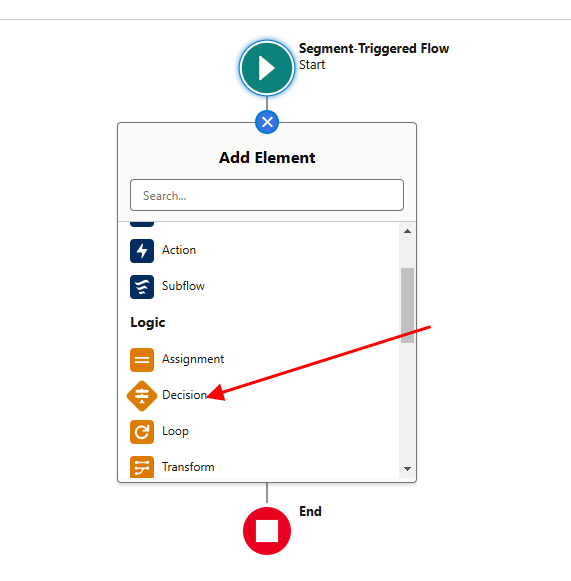
Create a Decision Split
Click on the plus icon and select Decision.
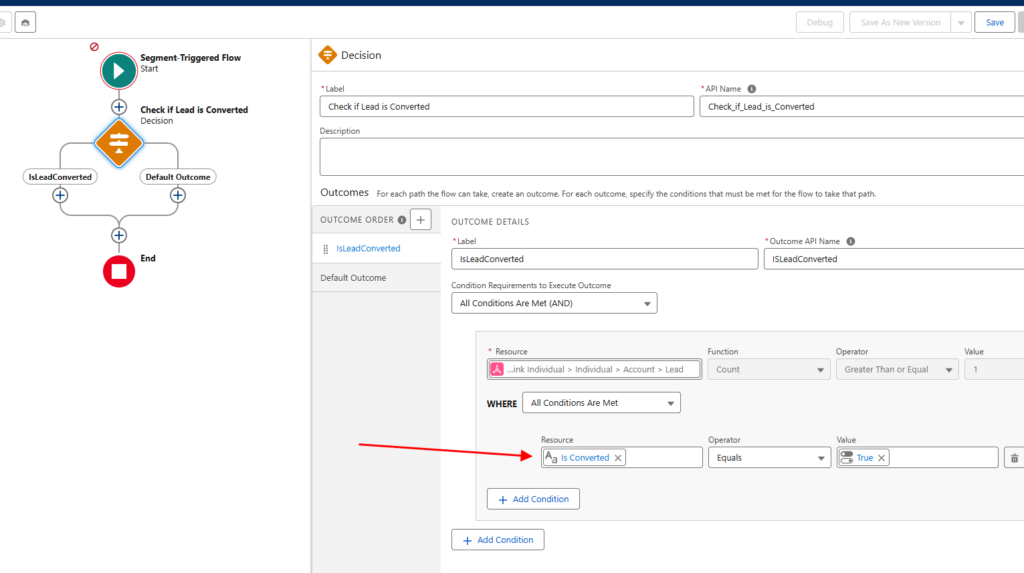
Name Your Decision Split
Give your decision split a name and assign labels to its branches. In our case, we will check if a lead is converted.
Configure the Condition
Select “All conditions are met” and navigate to:
Resource → Data Graph Objects → Related Objects → Unified Link Individual → Individual → Account → Lead → IsConverted, then set it to True.
You can add email activities to the flow to test whether the splits are working and ensure emails are being delivered to the intended recipients.
Save the flow and give it a name.
After activation, you will be able to view analytics on the flow next to the email activities.
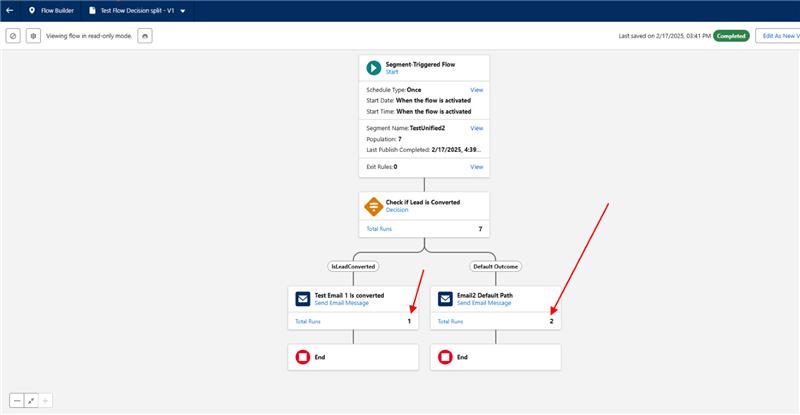
My segment contained 3 leads and 4 contacts. Since the conditions were based on leads, only the 3 leads were processed. Out of these, only 1 was converted, while the other 2 were not.
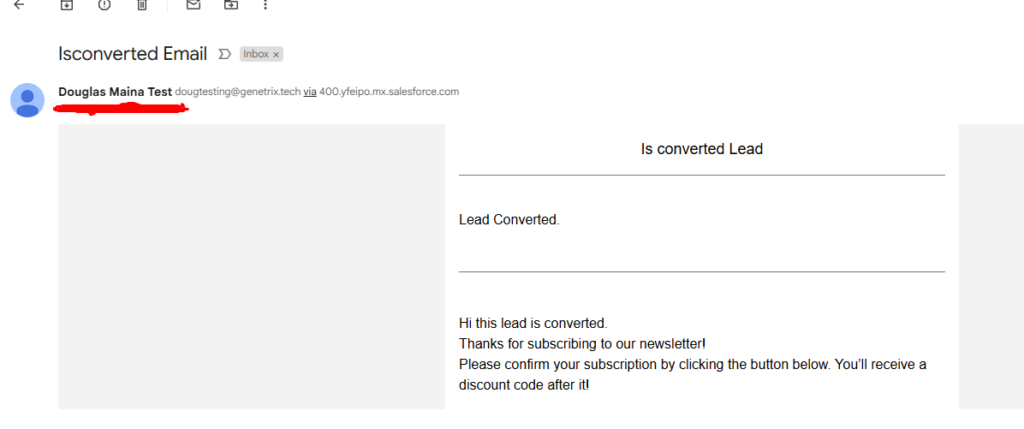
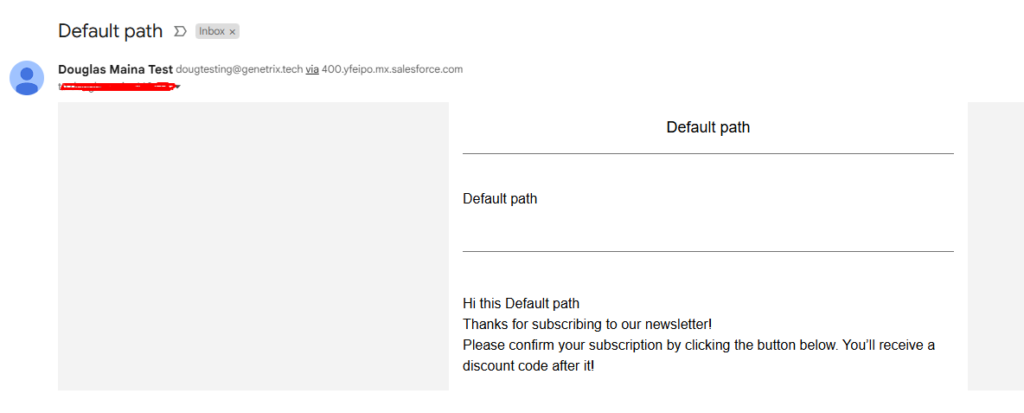
As a result, the converted lead will receive the IsConverted email, while the other 2 will receive the Default Path email.
Here’s how the two emails appear in the inbox:
Isconverted Email
Default Path Email.
Congratulations on making it this far! That’s how audience segmentation works in MC Growth Decision Splits using Data Graphs. I hope you found this guide helpful—now it’s your turn to try it out! Feel free to test it and let me know if you have any questions. Happy experimenting!
